Happy Post-Labor Day!!
I hope you all had a wonderfully relaxing, or productive weekend. My parents were here visiting us this weekend from PA and they brought us lots of stuff…including two things we cannot get here in MI.
We CANNOT find a good cheesesteak anywhere (it’s all about the roll!) and we also cannot find decent hamburger and hot dog rolls. We prefer Martin’s potato rolls…so here is what they brought us (all freezer-friendly):
THANKS MOM & DAD!! 🙂 🙂 🙂
So we spent our weekend touring around Eastern MI and relaxing…
You may have spent your weekend, as many people do, fixing up, organizing, cleaning, or doing other household chores!
I actually made these easy curtains a few weeks before Labor Day, but I thought they’d be a good post for today. I got my inspiration here.
What You’ll Need:
- Curtains (I used 84″ panels that I bought at Target on Sale; I would have made my own, but I don’t own a sewing machine.)
- Acrylic Paint (I used black and white to make gray)
- Textile Medium (I found this at Michael’s Craft Stores)
- Painter’s Tape
- A yardstick
- Fabric pencil
- A small paint roller & tray
Step One:
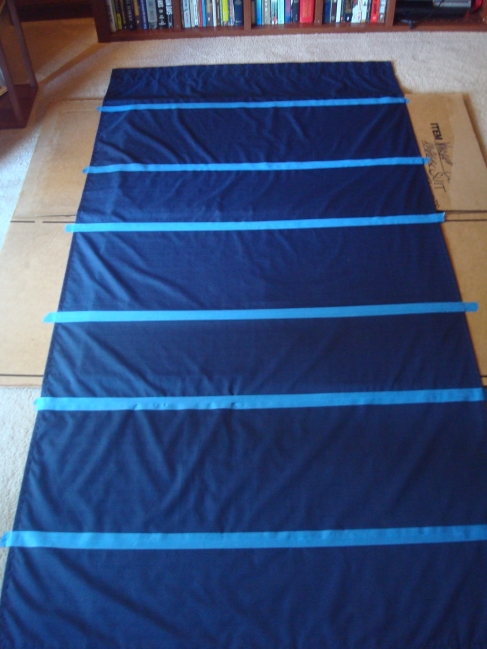
Lay your curtains out on a flat surface (the floor), measure the curtains to double check the length (mine were about 83″ instead of the advertised 84″), decide on the size of your stripes (mine were just shy of 12″ a stripe).
Step Two:
I used navy curtains and used a white fabric pencil and yardstick to mark off my stripes. I then took the painter’s tape and taped the OUTSIDE of each stripe that will be painted.
Step Three:
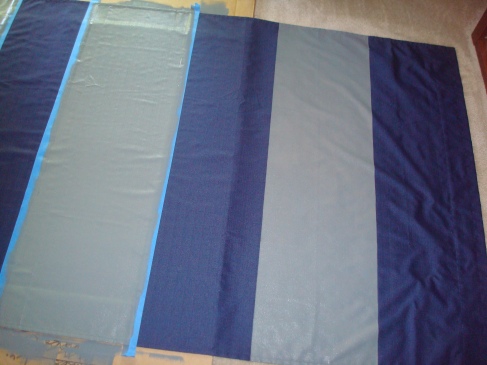
After your stripes are taped off, mix your paint and textile medium according to the bottle (I think it’s 2 parts paint to 1 part textile medium). Our bedroom colors are gray and navy so I mixed black and white paints until I got the shade I wanted.
(Ignore the DVD rentals in the background AND note my nifty-and FREE-paint tray!) 🙂
Step Four:
Paint! Glob it on pretty thick because the fabric will absorb the paint and you may have to go back for a second coat if it’s not thick enough. (I put an old, flattened moving box under my curtains to protect from any bleed-through.)
Step Five:
After painting all of your stripes, while the paint is still wet, SLOWLY peel the painter’s tape off. (** This is when I started to squeal with glee because the lines were so crisp and it was so pretty!!) 🙂 🙂
Step Six:
Allow to dry COMPLETELY. I set mine up with a small fan pointed on it to speed up the process a bit. Once the paint is completely dry, use your iron (dry-no steam) and a pressing cloth to iron over the painted stripes. This will set the textile medium so that your curtains will be washable!!
Step Seven:
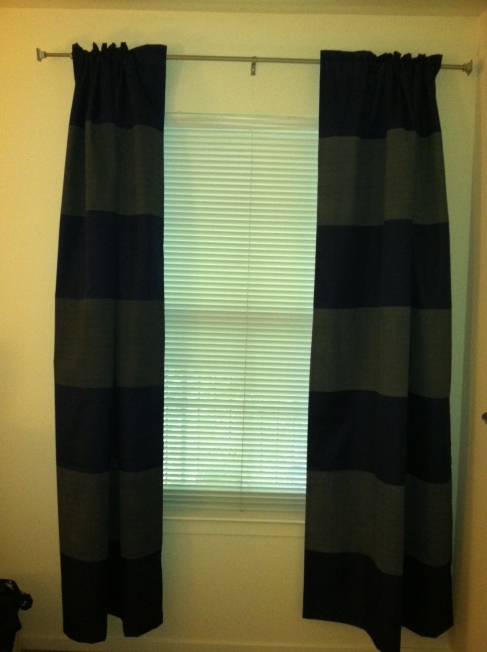
HANG those beautiful curtains! 🙂
(This took a while because I didn’t want to put big holes in the walls of our rented apartment and I thought I had a BRILLIANT idea…a stroke of GENIUS! I thought I could hang our curtain rod using the 3M Command velcro strips!! Well…sadly…it didn’t work and I ended up having to drill holes in the wall anyway.) 😦
(This picture isn’t the best…but you get the idea! They look much better in person!!)
We LOVE our curtains! We love that the sun peeking through the blinds early every morning doesn’t wake us up anymore and we can sleep in a little on the weekends! I also love that they add a little something to our bedroom with it’s boring white walls.
I Hope you were able to have a productive Labor Day weekend!
Happy Crafting! 🙂


